Self hosting
Setting up a self hosted instance is a great way to keep data under your own control. Installing a new environment requires some Unix/Linux knowledge and one or more servers. There are several types of servers required, when starting small it's possible to combine multiple servers on one machine, e.g. host MySQL and Apache on the same server. The following instructions are tested on the most recent Ubuntu LTS, but installation is possible on most Linux distributions.
Requirements
Linux server(s) with SSH access
Webserver with at least one CPU core, 512 MB memory and 1GB disk
Database server with at least one CPU core, 512 MB memory and 1GB disk
ClickHouse server or ClickHouse cloud with at least 8GB RAM
A domain name and DNS provider
Moderate Linux knowledge
Installation

Webserver

The first step is installing one or more webservers. Each webserver works autonomously so you can add and remove servers when needed. These instructions use Apache with FPM (FastCGI Process Manager) but nginx works just as well. Install Apache, PHP, Redis and the required PHP modules. Consult the Redis documentation to enable some form of persistency when possible.
apt install apache2 libapache2-mod-fcgid curl php-fpm redis php-redis php-mbstring php-curl php-mysql php-gmp

MySQL/MariaDB

MySQL is used to store the settings and metadata for the logs. Both MySQL and MariaDB are tested and should work equally well, mysql-client is optional but useful for testing.
apt install mysql-server mysql-client
Tip: secure the SQL installation.
mysql_secure_installation
It's recommended to create a user account with limited privileges to connect to MySQL. Login to MySQL as root and create a "txtlog" user, replace p@ssw0rd with a secure password.
CREATE DATABASE txtlog COLLATE 'utf8mb4_unicode_ci';
CREATE USER IF NOT EXISTS 'txtlog'@'localhost' IDENTIFIED BY 'p@ssw0rd';
GRANT ALL ON txtlog.* TO 'txtlog'@'localhost';

ClickHouse

ClickHouse handles the heavy lifting of processing billions of log entries. Instead of self hosting ClickHouse server, using the official ClickHouse cloud should also work. For self hosting, add the repository using the ClickHouse installation instruction and install ClickHouse server.
apt install clickhouse-server clickhouse-client
Configuring ClickHouse is similar to MySQL. Again, create a user to connect to ClickHouse. Login to ClickHouse with the default user and create a "txtlog" user, replace p@ssw0rd with a secure password.
CREATE DATABASE txtlog
CREATE USER IF NOT EXISTS txtlog IDENTIFIED WITH sha256_password BY 'p@ssw0rd'
GRANT ALL ON txtlog.* TO txtlog
For the admin page to work grant the following additional privileges as the ClickHouse administrator.
GRANT SELECT ON system.query_log TO txtlog
GRANT SELECT ON system.parts TO txtlog
GRANT SELECT ON system.parts_columns TO txtlog
GRANT SELECT ON system.data_skipping_indices TO txtlog
GRANT SELECT ON system.disks TO txtlog
Scaling to more servers can be done using ClickHouse Keeper or by adding more ClickHouse servers and adding the IP and credentials to the Server table on the MySQL server.

Cron jobs

Log rows are processed in batches using a fast in memory queue (Redis Streams). On each webserver, set at least two cron jobs to handle updating the cache, converting Redis memory streams to disk and to update the ClickHouse database.
Create a cron job to update the cached settings and convert Redis streams (which contain the log lines) to files.
curl 'https://txtlog.net/cron?updatecache=true&action=cachetofile'
Create another cron job to insert the rows into the ClickHouse database.
curl 'https://txtlog.net/cron?action=filetodatabase'
To combine these, the following code removes the existing cron job for the current user (!), creates the required jobs and runs them every minute.
crontab -r
(
echo "* * * * * curl -s 'https://txtlog.net/cron?updatecache=true&action=cachetofile' >>/tmp/txtlog.cron 2>&1" &&
echo "* * * * * curl -s 'https://txtlog.net/cron?action=filetodatabase' >>/tmp/txtlog.cron 2>&1"
) | crontab -
To use the Geo IP and Tor IP functions, run these commands.
curl 'https://txtlog.net/cron?action=geoipdownload'
curl 'https://txtlog.net/cron?action=geoipparse'
curl 'https://txtlog.net/cron?action=toripdownload'
curl 'https://txtlog.net/cron?action=toripparse'
Application installation

Clone the latest version from the GitHub repository, move it to the website directory (e.g. /var/www) on the webserver. Start the installation process, which will guide you through the settings. The installer will automatically disable after the installation is complete. When in doubt about a setting, keep the defaults shown on screen.
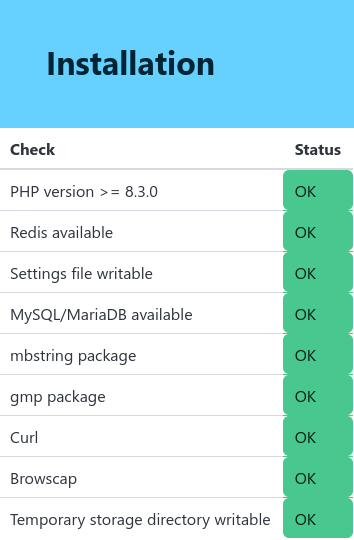
The installer will run dependency checks before the installation can proceed.
Installation

Administration

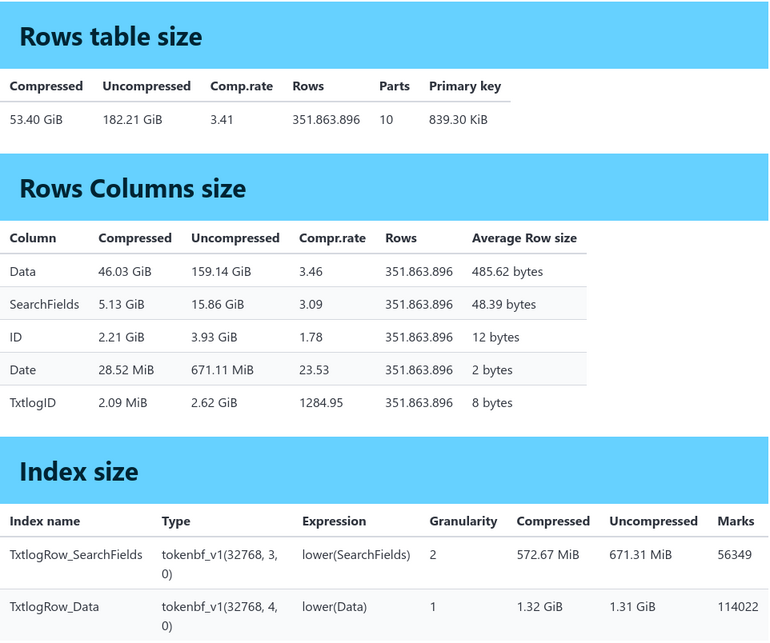
After the installation is complete, the installer will be disabled. You can use the admin page to get a quick system overview.
Admin page